You don't have to go to a salon to get a manicure. A beautiful manicure can be done at home. We will tell you how to do a manicure at home, and what to pay attention to and what tools you need to have at home for a manicure. But first you need to, firstly, understand what your nails need, in addition to varnishing, and, secondly, choose care products in accordance with the type of nails.
Three typical troubles are known - delamination, brittleness and grooves on the nails. But many, doing manicure at home, only think about how to varnish their nails. And at the same time they do not pay attention to the correction of nail defects. But the right manicure at home can (and should) completely replace the manicure in the salon.

a) For brittle nails, frequent care is recommended - this will strengthen them. Therefore, for them, do a manicure at least 2 times a week.
b) Periodically give your nails a break from colored polish. And from white as well.
c) Treatment of nails should be carried out with a special varnish containing calcium and B5. The product should be applied in several layers, this will create a protective "shell".
a) You can smooth the surface of the nail with a grinding file.
b) Please note that any grooves are a signal for a health check. Longitudinal indicate a lack of vitamins and disorders in the intestines. Transverse can occur after illness or a long diet. When the cause is eliminated, the grooves will disappear on their own.
 |
 |
Here we have given the tools and preparations that you will need for a full-fledged home manicure.
 |
1. GlasFeile glass file, 1380 rubles, La Rlc. |
 |
1. Balsamo Cuticole softening gel, 175 rubles, Deborah. |
 |
1. The base from the bundle Express Nail Care, 155 rubles, Maybeliine. |

Consider step by step how to make a manicure at home. At the same time, you will not only make magnificent nails, but also relax.
Revitalizing finger massage for home manicure.
Immediately before the manicure itself, a finger massage is done.
1. Create the right atmosphere in your home. Light up and put on your favorite music. Gather all your tools together so they are within reach.
2. Use nail polish remover to remove old nail polish.
3. Trim and trim your nails to the desired length (and shape).
4. Smooth out any sharp corners on your nails by buffing and polishing them. To do this, grease your hands and use a special nail file (in no case metal) to give the correct shape to uneven edges. As you remember, the movement of the file is allowed only in one direction.
5. With an orange stick, remove the dirt on the top and bottom of the nails.
6. Make a solution with mild soap and warm water. To do this, take any mild soap, for example, "Children's" or "Spermaceti". These varieties cleanse and soften the skin well. Soak your hands in soapy water for a few minutes, then rinse in plain water.
7. Then dry your hands thoroughly.
8. Further, it is possible, in a simplified version, to simply apply the cream on the cuticle and rub it gently. If you have time, you need to prepare a natural emollient: take 1 tbsp. a spoonful of cucumber or potato juice, an infusion (1 liter per glass of boiling water) of oatmeal ("Hercules"), sage or lime blossom.
9. With an orange stick, gently push the cuticle away from the nail.
For this you need:
Baths and masks help to restore softness and elasticity to the skin of the hands, relieve redness and peeling, and also strengthen weak, dull, delamination-prone nails.
 Modern society creates its own canons and unspoken rules, establishes the norms of communication and appearance, when everything is taken into account - from costume design to well-groomed hands and neat nails. According to existing foundations, a manicure should always be present. This rule applies to both men and women.
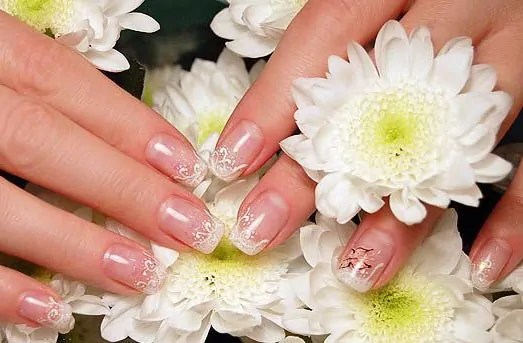
The appearance of nails plays a big role in any situation. But still, it is of particular importance, of course, for lovely ladies who spend a lot of time and effort doing manicures at home or in salons, trying to give their nails hardness, beauty and shine.
To create and maintain an impeccable manicure, some of us prefer to visit professional beauty salons or beauty parlors, using the services of qualified specialists who have a whole arsenal of additional devices and tools, while others do their own manicure at home. Contrary to popular belief that “a professional knows best”, sometimes a manicure done at home is indistinguishable from a professional manicure.
Let's try to understand the existing nuances, because the dream of long nails, healthy and beautiful, does not have to be just a dream at all, it is quite capable of becoming a reality. For its execution, you only need a little attention, time and knowledge of some tricks that allow you to get the desired effect from a manicure at home.
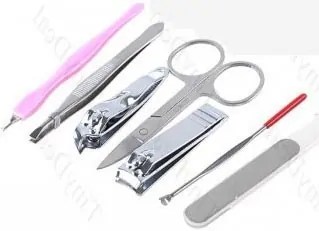
Necessary tools and products for manicure at home.
If you have ever visited a professional nail salon, you must have been surprised at the variety and volume of different tools (scissors, tweezers, spatulas), bowls and all kinds of products used for nail treatment. Looking at such an “assortment”, it’s time to get confused, waving your hand and substituting this very hand for a specialist.
Meanwhile, to perform a good manicure at home, you really do not need so many devices that are usually present in any standard manicure set.
So, when planning to do a manicure at home, make sure that you have at hand:
You will also need for a manicure at home:
Having prepared the above list of items and tools, you can begin to perform a manicure. On average, this procedure will take from 30 minutes to 1 hour, depending on the condition of the hands, skills and individual "complexity" of obtaining the desired result.
Performing a manicure at home
The word "manicure" comes from a combination of the Latin manus (hand) and cura (care), thus implying cosmetic procedures for treating not only the nails on the fingers, but also the hands themselves. Contrary to popular belief, when performing a manicure procedure at home, a certain sequence, accuracy and compliance with a number of rules are important, since the nail, despite its relative rigidity, is subject to external influences and can be injured as a result of incorrect or untimely performance of actions. The skin around the nail plates is also delicate and receptive to the treatment method. Therefore, try to follow the following sequence when performing a manicure at home.
Nail polish removal
The first thing to do when starting a manicure is to remove varnish and other decorative ornaments (rhinestones, sparkles, etc.). The nail plate must be completely clean. To do this, use nail polish remover and a cotton pad or swab. When choosing a nail polish remover, make sure it doesn't contain acetone, as it dries out nails, making them dull, brittle, and prone to breakage.
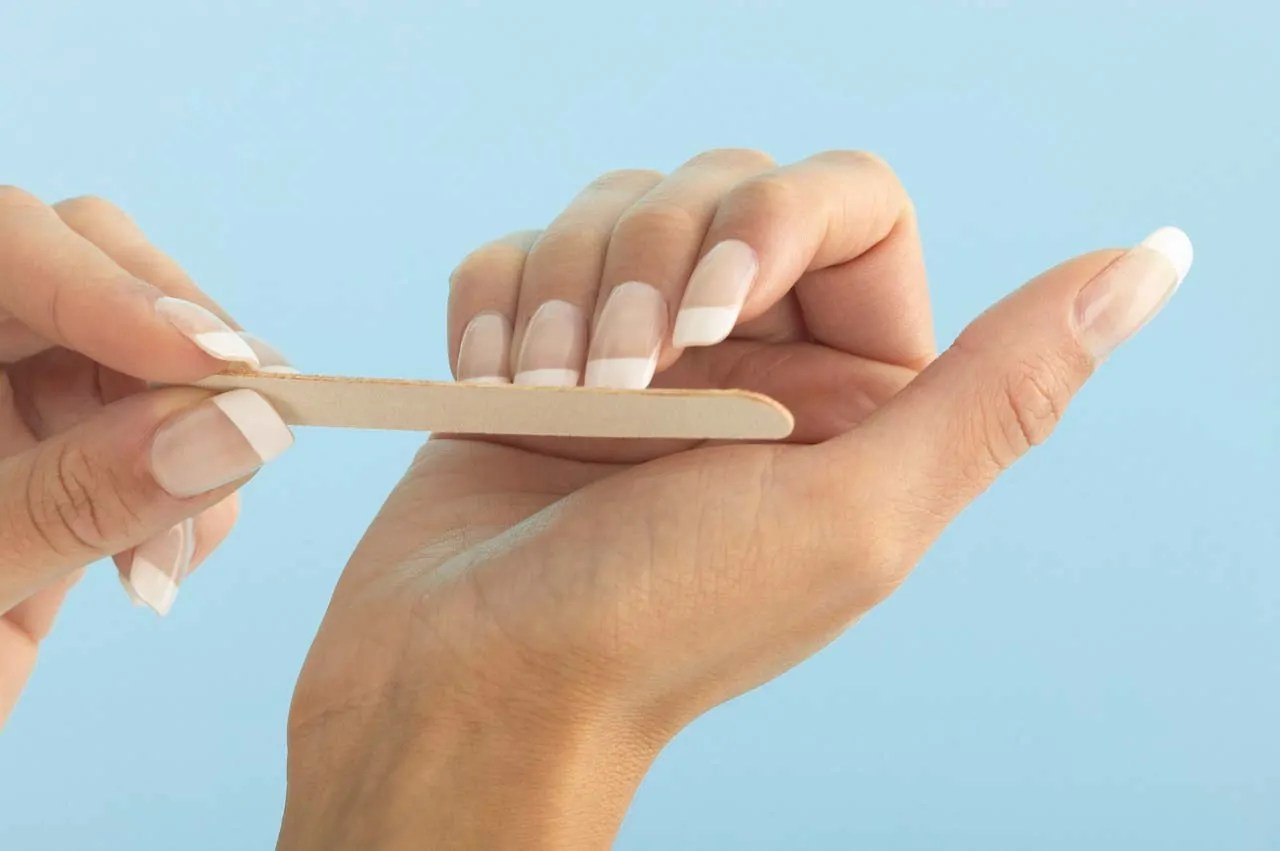
Shaping and Shining
Then, using the appropriate nail files, the nails should be given the desired shape and shine, which will become the basis of the future manicure.
 Remember: only dry nails can be filed and polished. Processing wet and, especially, soaked nails, which are the most vulnerable, can lead to a violation of their structure and delamination.
It is important that the file moves in one direction along the edge of the nail. The ideal option is to file the nail from the side edges of the nail plate to its tip (center).
Any shape can be given to the nails - from the classic oval to square or, on the contrary, sharp. The main thing is to be guided in this matter not only by personal taste, but also by the shape of the fingers, the condition of the nails themselves. It is known that the square shape is considered the most resistant to external influences, which allows you to save weak and brittle nails due to transverse grinding. But, as a rule, it is acceptable only for hands with thin and long fingers. In other cases, it is able to visually "shorten" the nails and the fingers themselves. Therefore, for plump handles and handles with miniature fingers, various versions of the classic oval shape are more suitable, which can be close to rectangular or, conversely, be more pointed.
A mirror shine to the nails is given by a special file - a polisher. It differs from a regular nail file by the presence of four working surfaces. It is more convenient when the edges of the polisher are numbered, in accordance with the sequence of their use.
Cuticle treatment
Preparing the cuticle for treatment begins with the application of a special cuticle remover. It not only softens the delicate skin above the upper part of the nail plate, but also prevents its further growth. The product must be allowed to soak for 2-3 minutes.
After that, hands can be lowered into a bowl of hot water, where it is desirable to add a soap composition for the nail bath. If there is none, use simple improvised means - liquid soap and bath salts. Proportion: for 1 glass of water, about 1 tablespoon of salt (without a slide) and a couple of drops of liquid soap.
After holding your hands in such a bath for 5-10 minutes, you can proceed to the main action - processing the cuticle. To do this, you need a pusher or trimmer for manicure at home.
After pulling your fingers out of the water, blot them with a napkin (or soft towel) and gently push the cuticle up using the rounded end of the pusher (trimmer) where the shoulder blade is located. Then, with the sharp side of the tool, remove the remnants of the cuticle from the surface of the nail plate. These manipulations must be done very carefully, without pressure, trying not to damage or scratch the nail and soft tissues located around it. It is advisable to perform movements from the center to the edge of the nail.
If the cuticle has been started and you are not completely satisfied with the result, the rest of the cuticle can be carefully cut off with the appropriate scissors. The movements should be small, which will prevent the formation of burrs.
Deburring
Skin nail clippers are used to remove burrs. They may have a rounded or pointed edge.
Remember: barbs should never be pulled, this can lead to the formation of wounds and other related consequences. They are easily removed if they are pinched a little with wire cutters. The edges of the burrs are smoothed out with similar well-aimed movements.
Processing of the pads and corners of the fingers
Hardened pads, calluses on the palms and sides of the finger are treated with a ceramic nail file or a small piece of pumice stone. Circumcision of rough areas of the skin is best avoided, since it is difficult to perform such actions carefully, making the traces of circumcision invisible.
Finishing a manicure at home
At the end of the manicure at home, apply a cream to your hands that will soften and moisturize the skin of your hands. Let it soak in for a few minutes. After that, degrease your nails with nail polish remover and, if desired, apply varnish.
Your manicure is ready!
Practical tips for manicure at home
As an addition, I would like to give some practical tips that may be useful for those who perform manicures on their own at home.
File selection
Remember that the right choice of a file is of the utmost importance, it is the key to the beauty and health of nails. So, for fragile, weakened nail plates, a fine-grained semicircular tool with a buffer zone is preferable, which will allow you to file and polish the nail well, while maintaining its structure. If there are no problems with fragility, and you can safely write your nails into the category of healthy and strong, then a sapphire or sand nail file will be an excellent choice.
It is advisable to use files that have an impeccably rubbing plane. When buying a tool, run your fingertips over its surface - a quality product does not scratch, has no protruding “grains of sand” and areas.
Rough nail files with a rough, scratchy surface were originally intended for sawing and processing artificial nails.
The use of iron tools is unacceptable.
Try to give preference to files on a cardboard or rubber base.
Trim or cut
Some experts recommend not cutting your nails, namely filing them with a good nail file. This measure prevents delamination and brittle nails. Perhaps this recommendation is an effective tool, but it takes a lot of time. For me, another option is more acceptable: cutting the nails to the desired length, and then filing the free edge of the nail plate until the desired shape is obtained.
Tools
Tools for manicure at home, such as nippers and scissors, must be sharp. If their cutting surfaces are blunted, there is a greater chance of cutting themselves and “acquiring” burrs due to incomplete (uneven) cutting of skin areas.
Manicure at home is recommended to be done once every two weeks. After each procedure, the instruments must be disinfected. To do this, it is enough to wipe them with a 70 ° solution of medical alcohol, which can be purchased at a pharmacy.
As you can see, doing a manicure at home is not so difficult. It is enough to know a few tricks and get some practical experience. Then you will always have your own "personal specialist" in manicure, and you will be able to save time on trips to the salon. In conclusion, I would like to give one more important advice: do not forget to properly care for your nails, use homemade baths, nail masks, and also monitor your health and nutrition. Be beautiful in everything - from hair to nail tips.
Sincerely, Tatyana Raduga.
It is no secret that the appearance and beauty of nails is of great importance not only for women, but also for men, which is why proper care is so important. To make a beautiful and neat manicure, it is not necessary to go to an expensive beauty salon, you can do everything yourself right at home.
Of course, some of the fair sex still prefer to trust the hands of qualified professionals, rather than, as it may seem to them at first glance, unjustified experiments at home. As a rule, such an opinion among girls is formed precisely from ignorance, and there are many ways that really help to process nails at home quickly and efficiently.
Home care involves not only covering nails with varnish, it is also important to choose the right care products. Basically, the main enemies of all girls are the delamination of the nail plate, brittleness and various irregularities. Do not think that painting your nails with varnish will immediately get rid of all problems, on the contrary, you can aggravate the situation even more.
Remember, it is initially necessary to correct the existing defects and only then proceed to create a manicure. Some representatives of the fair sex believe that salon procedures cannot completely replace those performed at home, in fact this is not the case.
If you have ever had to use the services of a beauty salon, you probably could see what a variety of different tools and tools the specialist used. Many girls, seeing so many tools, think that it’s simply impossible to treat their nails using them at home, but in reality everything is not as difficult and scary as it seems at first.
No matter how surprising it may sound, but to make a good and professional manicure at home, you only need a standard set, which will not be difficult to find. So what do you need to prepare:
 Ordinary and grinding nail files.
Only after preparing all of the above tools and tools, you can start manicure. It usually takes about an hour to complete the procedure, but it all depends on the condition of your pens and, of course, professionalism. It's no secret that the more experience you have, the faster and more accurately you can cope with the task, so don't be discouraged if the first time you didn't get exactly what you expected.
Just before the procedure itself, it will not be superfluous to massage the fingers to relax and prepare them.
It doesn’t hurt to create the right atmosphere at home: light candles and put on your favorite music. It is better to place the tools next to you, so you do not have to constantly reach out and be distracted from the process. Remember, in creating a homemade manicure, any, even the smallest detail, is important.

It is worth noting that beautiful nails should be not only on the hands, but also on the legs. However, some of the fair sex are faced with such an unpleasant problem as nail fungus. Most often, this not very pleasant disease appears due to tight shoes that you are forced to wear all day.
However, toenail fungus is not a sentence, and if you approach the solution of the problem in time and correctly, then you can quickly and easily get rid of it. First, be sure to change your shoes. Secondly, treat your nails with nail scissors and a nail file. Thirdly, if possible, remove the areas of the nails affected by the fungus.
To give your nails a really beautiful and well-groomed look at home, you need to follow a few rules and useful recommendations, such as: 
Now everything is possible at home, the main thing is to know and be able to put into practice all the necessary rules and recommendations that can be easily found on any forum. Much of your success depends on what tools and tools you use. For example, nail clippers and scissors, of course, should be sharp, so you reduce the chances of cuts and burrs, so you need to properly monitor this.
It is worth noting that a manicure at home should be done no more than once every two weeks. Watch your nails and on your feet - choose only comfortable shoes, so you will avoid a lot of inconvenience and trouble.
As you can see, doing a manicure at home is not so difficult, the main thing is patience and perseverance. And having gained the necessary experience, you will save not only your time, but also money that you used to have to spend every two weeks. And finally, one small but very helpful advice- watch your health, nutrition, wear only high-quality shoes, do not forget about nail baths and masks.
Manicure at home should be able to do every girl. Exclusive rights to a good manicure do not belong to well-groomed women alone. Keeping an eye on your hands is useful for all people in terms of hygiene and accuracy: timely processing of fresh cuticles will prevent inflammation of the burrs that have appeared.
Nail processing involves accuracy and patience: if you are ready for painstaking actions, then you can professionally handle manicure at home, and we will show and tell you about everything step by step with the help of photos and videos.
For those who not so long ago had a manicure with a master and followed his work, it will be a little easier, but the rest will achieve perfect results over time. There is nothing particularly complicated here, you just need to be patient and follow the procedures accurately.
We will share with you the important secrets of true manicure at home - from professional techniques to making your hands visually appealing and soft. Following our advice, you will give your nails beauty, accuracy and health.
First of all, if necessary, it is necessary to clean the surface of the nail from the old varnish. It is better to remove the coating with a tool that does not include drying nails and harmful acetone.
Photo. Manicure at home
The old varnish has been removed, now the nails are ready for the filing procedure. First, choose a tool that matches your nail structure.
Important: actions with a file must be carried out only with dry and hard plates, no baths, otherwise the nails will delaminate. It is also undesirable to use scissors for cutting and forming the plate, cracks may appear.
So what's your choice:
Important: metal tools are undesirable, they lead to delamination of the nail structure.
How to hold a saw? Keep a small angle between it and the edge of the plate, avoid contact with the skin so as not to damage it.
In which direction should the saw be moved? File the plate from the extreme rollers to the center to avoid edge roughness and breakage of the nail.
Important: do not climb far into the corners, otherwise you will injure the rollers and get inflammation.
Movements should be soft and confident, without sudden pressure. When finished filing, remove the dust with a nail brush or a smooth cloth (lint-free).
After watching a video about manicure at home, you should have no questions left.
Now let's choose the future outlines of the nails, which depend on many factors:
There is a universal option for the shape - oval: it is combined with any shape of the hands and fingers. The wide-angle outline of the nails will suit thin and long brushes. If your nails are rounded and wide at the same time, the best option for processing is to leave a sufficient (but not prohibitive) length and point.
Please note that very long plates require additional (bio)gel, acrylic or shellac care, otherwise they will break constantly. Extremely short plates make the hands “heavier”, distorting their natural shape. The ideal length of the edge of the plate is from three to five millimeters: it is both convenient and aesthetically pleasing.
Important: for the free edge of the plate, it is necessary to use a tool that is less rough than for the main filing. A fine abrasive will remove roughness and save you from snagging and breakage: make sure the edge is smooth by running your fingertip along it - barely touching it.
Do not remove subungual dirt with metal tools so as not to scratch the delicate film: take a manicure brush or a bone stick for cleaning.
If you don’t want to varnish the plates, polish them: a special polisher will allow you to achieve perfect smoothness. There is an excellent device with four active planes marked with numbers, by which you can track the sequence of their use.
Important: you can use the polisher monthly, but not more often if you do not want excessive thinning of the nail plates.

Photo.. Working with a nail file
There are two ways to tidy up the cuticle: using pruning, and not using it. The first option, trimming, stimulates the cuticle to grow faster over time (similar to frequent haircuts), so the second method is more delicate if the cuticle does not bother you much.
For the non-cutting method, a special removal compound is used. Its consistency can be liquid, gel-like, in the form of a cream or lotion - this is not the main thing: the essence is in the composition containing softening fruit acids. After application, there will be a feeling of dryness - do not worry, this is normal, since the product has the ability to degrease living tissues:

"lubricate the cuticle and side ridges from the inside
..."

"Clean off the inanimate top layer from the nail carefully ...
"

"Sand the rough surface of the rollers with a diamond file
..."
This composition inhibits the growth of the cuticle, so further processing will not happen soon.
The trimming method of getting rid of the cuticle begins with a finger bath. The dosage of the solution for steaming is in the proportion:

Do as in the photo
Steps to remove the cuticle by trimming:

"Cut the cuticle gently with sharp nail clippers or tongs
..."
It is imperative to get rid of painful burrs: they bring discomfort and, becoming inflamed, spoil the appearance of the fingers. For the procedure, you will also need tools (disinfected and sharp) and warm water with glycerin (one teaspoon is enough for the bath):


"cut off the burr carefully with tweezers..."
After dealing with the cuticles and burrs, soften the nail plates and the tissues surrounding them with special cuticle oil, massaging and kneading your fingers lightly. This should not be neglected: massage with oil is not only pleasant, but also useful - it strengthens the nail, regenerates water-fat protection and softens the cuticle. In the absence of a special composition, take ordinary, but real oil (for example, olive oil). Daily implementation of this procedure will give you beautiful nails after a while.

"soften your nails with cuticle oil...
"
Important: if you paint your nails, a similar procedure should be postponed and performed after the coating has completely dried: if the plates are greasy, the varnish will lie ugly on a slippery surface and quickly peel off.
Again, if varnishing is not expected soon, you can smear nails instead of oil with a special strengthening agent: this is especially true for those who cannot boast of strong and fresh nails.
The choice of means is up to you, today there are a lot of them: when choosing, read the instructions, it will tell you whether it is yours or not. Excellent reviews received the IBX System complex, which acts deep into the nail and gives it elasticity, strength and a healthy look. After applying it, you can immediately decorate your nails with any coating - it will create a protective layer and protect delicate nails.
For a longer coating, the nail surface should be degreased, this is done in one of the following ways:
To protect the nail from harmful inclusions of colored varnish and from the appearance of yellowish spots on it, cover the plate once with a colorless varnish. This transparent substance is an excellent base for further layers that will lie flat, without gaps or thickening. It will also increase the life of your coating.
To obtain a high-quality surface, be sure to wait for the base to dry - this is not long, about five minutes.
How to do color manicure at home:

During staining, sit comfortably, make sure that your hands do not tremble - rest your elbows on the tabletop. To remove extra strokes along the edges of the plate, take a special pen (corrector) containing a nail polish remover - your manicure at home will be perfect.
If there is no handle, you can use a cotton swab with a solvent, but the villi can separate from the cotton wool and ruin the beauty.
It happens that there is no certainty in choosing the shade of the coating, the eyes run wide. Here are some tips on how to make a decision.
If your appearance is classified as a summer or winter type (in terms of color), a coolish color that shimmers blue will look great on your fingers. Autumn-spring skin color (with a yellowish tinge) requires a warm tone of coverage, ideal options are red and pink.

On elongated almond-shaped nail plates, a continuous layer of a deep matte shade looks great. Shortened and wide nails visually become longer and thinner if they are painted with a pale mother-of-pearl color only in the center of the nail.
Important: do not apply the mother-of-pearl composition to a damaged plate, dotted with grooves - it “shows” all the irregularities more strongly.
Do not ignore what you will be wearing, especially if the manicure should emphasize the color and style of the dress or accessories; the color of lipstick is also important.
When decorating your fingers with jewelry, pay attention to the combination of tones of the nail coating and the shade of the stones:
If you are a fan of nail jewelry - go for it! You can compose thread and ribbon patterns, use rhinestones, stamps, broths and dried flowers, as well as various techniques such as nail art and lace. Of course, the drawing must first appear as a sample (a table or paper will do - you can sketch it): you should not immediately start processing nails so that you do not have to wash off painstaking work.
Well, now the final touch is a fixer. By name, everything is clear, it protects beauty from external "aggressors" - heat, cold, grazing on sharp and hard objects. Additional pluses are the amazing shine and longer service life of a lovingly made coating.

Important Don't forget the oil massage!
It will not be difficult if you have mastered manicure at home. So, the main part of the work is finished, it remains only to follow the hands after the manicure so that the coating always looks fresh, and the brushes are well-groomed and rested.
Use the cream three times a day if your skin is prone to roughness and redness:
Twice (excluding the last point) will be enough for those who do not have serious problems. When applying the cream, do not forget about the nail plates and massage the fingertips.
Baths will help your hands to relax. They can be made in three types:
In conclusion, we will share a number of recipes for maintaining healthy nails.
White spots on the plate indicate a vitamin and mineral deficiency, but most often the problem goes away after taking calcium-containing drugs.
Too much brittleness (brittleness and flaking) can be reduced by baths: two tablespoons of sea salt per liter of water. Dip your hands in a warm solution for a quarter of an hour, repeat every day for a crescent - three weeks.

To prevent brittle nails due to frequent manicures with a color coating and removing it with acetone, use a greasy medium:
So, watch the video and try manicure at home - we tried to present everything in an accessible way and not miss a single detail so that your hands are always well-groomed and fresh.
Beautiful nails give self-confidence, cheer up, raise the status of their owner.
But not everyone can afford to visit the salon all the time. For many, the topic of manicure at home is relevant.
To properly make a beautiful manicure, preliminary preparation is necessary.
It includes the purchase of manicure tools, disinfectants and related items that you cannot do without.
Good quality tools- this is a guarantee of high-quality cuticle care, prevention of delamination of nails and a high speed of the procedure.
For a classic edged manicure, you will need the following tools:
| Tool | Description |
| 1. Cuticle nippers. | It is best to purchase a tool brand "Solinger", this is an old German brand of cutting tools. Tweezers have different sizes. They determine the length of the blade. It is good to take 0.5 cm. |
| Double-sided cuticle spatula: on the one hand it resembles an oar, on the other hand a hatchet. Must be metal. | |
 3. Knipser 3. Knipser
|
Tool for trimming the length of the nail. It looks like a small guillotine, it happens for fingernails and toenails. |
 4.File 180 grit 4.File 180 grit
|
Gridness should be printed on the file itself. |
 5. Polisher 2000 grit 5. Polisher 2000 grit
|
There are double and triple polishers, then the grit value for each side must be printed. |
| Related Items: | |
 1. A large bowl, ceramic is better - it keeps the temperature well; 1. A large bowl, ceramic is better - it keeps the temperature well; |
|
 2. Towel or napkin; 2. Towel or napkin; |
|
 3. Cotton pads; 3. Cotton pads; |
|
 4. Orange sticks; 4. Orange sticks; |
|
 5. Nail polish remover. 5. Nail polish remover. |
|
| Disinfectants: | |
| 1. Chlorhexidine; | |
| 2. Alcohol solution 70%. | |
| 3. In the pharmacy it is possible to purchase a professional product for the treatment of hands and metal tools. | |
If the experience in nail care is still small, useful orange sticks. They can move the skin at the cuticle and clean out the eponychium.
Some people use it to trim their cuticles. manicure scissors. This is acceptable, but the best quality of manicure will be if you use tweezers. Scissors have straight blades, while tweezers have bevelled blades. That's why the tweezer cuts the skin more and deeper and after them, the manicure lasts longer.
 Fork for nails
 Since we are talking about the cuticle zone, no blade pressure is allowed. This can damage the matrix - the growth cells of the nail under the hole. As a result, the nail will grow crooked for the rest of its life.
Files vary depending on the grit. In grits, the amount of abrasive applied to 1 square centimeter of the file is measured:
The coarsest file is 80 grit. It is used to reduce the length of artificial nails;
Step 1: Wash hands with soap;
 hand washing
 Step 2: Apply cuticle remover
 Apply cuticle softener
Step 3: Starting with the little finger, push the roller back with the rounded tip of the file or orange stick;
 retracting and grinding the roller
 Step 4: Remove softened thin skin from the surface of the nail;
 Cuticle removal
 Step 5: Process the rollers with a file of 180 grit;
 sawing of rough rollers
 Step 6: Wash your hands with soap;
Step 7: Degrease the nails with an alcohol solution;
 Nail degreasing
 Step 8: Perform lacquer application.
 Lacquering
 There are no difficulties in easily and quickly painting your nails and doing it exactly at home, without going to the roller with a brush.
First of all, the varnish must be of a certain consistency. The new varnish applies well and dries quickly, because solvents have not yet evaporated from it. If the varnish has thickened, add 3-5 drops of varnish solvent to it.
Do not try to dilute the varnish with acetone or nail polish remover. These tools will cause the varnish to curl.
Step 1: Dip the brush into the varnish, squeeze out the excess reverse side brushes on the bottle with a movement “away from you”.
Step 2: Place the brush in the middle of the nail at a 45 degree angle and move towards the cuticle. Before reaching the roller, stop the brush and make a movement to the free edge of the nail. All this double movement must be done without lifting the brush from the nail and without stopping it.
 Setting the brush
  Smooth movement to the cuticle
  brush stroke to free edge
 Step 3: Put the brush on the nail in the cuticle area so that the brush lies in the hand perpendicular to the finger. Make a brush stroke along the cuticle to the side roller, round the stroke along the contour of the nail (the brush changes position - now it lies in the hand parallel to the finger) and bring it to a free edge of the nail.
 Movement to the side roller
 Step 4: Repeat this movement on the other side of the nail. If the polish on the brush runs out during the process, turn it over and continue.

Step 5: With a well-wrung brush, draw along the end of the nail, sealing it.
 Result
  Nude varnish
 Step 1: Dip the brush into the varnish, squeeze out the excess with the back of the brush on the bottle with a “away from you” movement.
Step 2: Put the brush in the middle of the nail at an angle of 5 degrees and move towards the cuticle, holding it almost in weight. The brush does not press on the nail, only the varnish touches the nail. Before reaching the roller, stop the brush and make a movement to the free edge of the nail.
Step 3: Bring the brush to the cuticle area. Hold the brush parallel to your finger. Barely touching the nail, move the brush towards the side roller and down to the free edge. The brush should pass along the side of the nail without touching the roller.
Step 4: Repeat this movement on the other side of the nail. If the polish on the brush runs out during the process, turn it over and continue.
Step 5: With a well-wrung brush, draw along the end of the nail, sealing it.
There are beautiful design options for which it is not necessary to go to the salon. They can be done at home: rhinestones, glitter, gel pen painting, stickers, broths, varnish painting, craquelure, velvet, cat's eye.
 cat eye stripes
  cat-eye-waves
 1. Cat eye design. For him, you will need to purchase a magnetic varnish and a cat's eye nail magnet. Still releasing options "Wave", "Stripes" and others. But the most spectacular is the "Cat's Eye".
 Cat's eye - made with gel polish
 It is done on a freshly applied layer of varnish. The magnet is brought to the nail so that the strip is along the nail. Hold 1 second.
If you hold the magnet closer to the nail - there will be a clear line, further - blurry.
If you bring the magnet first vertically and then horizontally, there will be a bright dot.
 Gel polish - made with ordinary varnish
 2. Design "Craquelure". A novelty hard varnish has appeared on the product market. This is a special cracking varnish that is applied to the dried previous layer.
The substrates of gold, white, black varnishes look good. Crack polish dries quickly. It can be thinned like regular polish.
If you apply it in a thick layer, it will crack into large pieces. If a thin layer - into small ones. You can combine: make one side of the nail with large fragments, and the other with small ones.
 Craquelure - large, medium, small.
 3. Velvet design. Varnish for this effect is called "Satin". After drying becomes matte, hiding all the irregularities of the nail.
If you put a top on it, it becomes shiny, like a regular varnish. You can make two nails shiny, and leave the rest matte. This design looks good in dark or bright colors. In pastel colors, it is almost invisible.
4. Leopard design. On a dried substrate (for example, the color of coffee with milk), uneven spots are applied with a brush with a slightly darker varnish (beige) and, without waiting for them to dry, a black dot is added to each spot. With an orange stick, each point is given the appearance of a comma.
 Design “Leopard”
 This design is classic. It can be performed not only in natural tones, but also in avant-garde ones. The turquoise-colored backing with blue spots and black commas looks good.
5. Zebra design.
 Zebra design
 On a dried white substrate, black lines are applied with a thin brush. There are varnishes for design, they have just such brushes.
The lines are drawn diagonally across the nail. The first line is drawn simple. The second, parallel to it, with a thickening coming from the middle of the line. It looks like a very narrow triangle. The third line is drawn simple along the previous one. The fourth is drawn with a thickening on the other side. Fifth is simple.
Can draw regular black gel pen. When the drawing dries, simply fix it with a top coat. One nail looks good under a zebra, the rest are white.
 Nails with rhinestones and bouillons
 6. Design with stickers, broths and rhinestones. It is used in festive occasions (wedding, graduation) and requires a beautiful dress.
Decorate two nails, tightly covering them with rhinestones of different sizes. Swarovski crystals are suitable, they can be purchased in a set. In the center, closer to the cuticle, put the largest stone. Near it, on both sides, there are smaller stones.
The smallest stones are placed on the edge of the nail. The space between large stones can be filled with golden broths. On the rest of the nails in the center of the cuticle put one small stone.
 Rhinestone pencil
 Put stones on wet varnish. The stone is taken by simply bringing an orange stick moistened with water or a special pencil for rhinestones to it and it sticks to it (there are special pencils for attaching rhinestones on sale). It is put on a fresh varnish, corrected, trimmed, it sticks to the varnish and releases the stick.
In nail salons, sterilization of the instrument is carried out in a dry-heat cabinet.
 Manicure tools
 At home, you can use the oven for these purposes. In a specially dedicated bowl, metal tools should be laid out, the oven turned on at 250 degrees and warmed up for 15 minutes.
If during the procedure a wound was inflicted and blood came out, the instrument is soaked in a solution before sterilization chlorhexidine or wiped three times with 70% alcohol(in the presence of special pharmacy products, processing is best done with them, according to the instructions).
Files and orange sticks can also be soaked in a disinfectant solution.. But if there was no blood while working with them, it is enough to wipe them.
Below you can find a detailed video on the sterilization of manicure instruments, some information will be useful to you at home.
In the pharmacy, in addition to chlorhexidine, you can buy hawthorn tincture 70%. This alcohol solution can be used as a disinfectant.
The professional line of pharmacy sterilization products is very diverse. Disinfectants are divided into two types: for hands and for metal tools. A pharmacist in a pharmacy will always tell you what products are available.
More may be needed glue BF-6. This is a medical adhesive for treating wounds. It is convenient for cuts, disinfects and seals the wound instead of a plaster.
It's good to have a tool on hand. from warts "Mountain celandine", brown color balm from herbs. If a wart is found during the manicure procedure, it can immediately be cauterized with this balm.
For nails to be healthy, they need to be nourished and treated. Aggressive environment makes them thin and brittle, appear on them. To avoid this, it is good to do with sea salt.
You don't have to buy expensive sea salt, you can use the one sold in grocery stores. You can add it with a manicure for steaming nails.
In the process of soaking the nails with such water, a phenomenon called osmosis. This is the exchange of salts of two environments. Nails, like appendages of the skin, are an excretory organ. The nail effusion comes out through microscopic holes on the surface of the nail.
After taking a course of antibiotics, it is formed very actively, preventing artificial nails from sticking to the nail bed. That is why after taking antibiotics, two weeks must pass before nail extension.
Those who have been in sea water for a long time on vacation notice improvements in the condition of their nails. Baths do not have to be done for a long time. 15 minutes is enough. This procedure can be carried out in the evening at the TV.
After the bath, hands are lubricated with a nourishing cream. The best creams - with fruit oils. It can be avocado, aloe, apricot oil. Just don't confuse them with essential oils. This is a completely different product.
If the cream says that it contains mineral oil, it is better not to buy such cream. These are products of chemical distillation of oil. Not good for nails.
You can always look beautiful, you just need to get used to it.


